Where to start?
Delivery Day
March 14th 2020
We bought our dream van to build into our home. But the work started long before that. After successfully navigating our move from Seattle to San Diego and settling down in a house, we identified our need to remain mobile for longer, and the planning began.
We dove in head first, with big ideas, and lots to learn. While this wasn’t our first mobile living project, it’s certainly the most ambitious. We are still working on it as I write this 3-ish years later. And still changing the plan. Despite all the time and changes, I’m often amused how similar the “final” product is to the sketches from these early days.
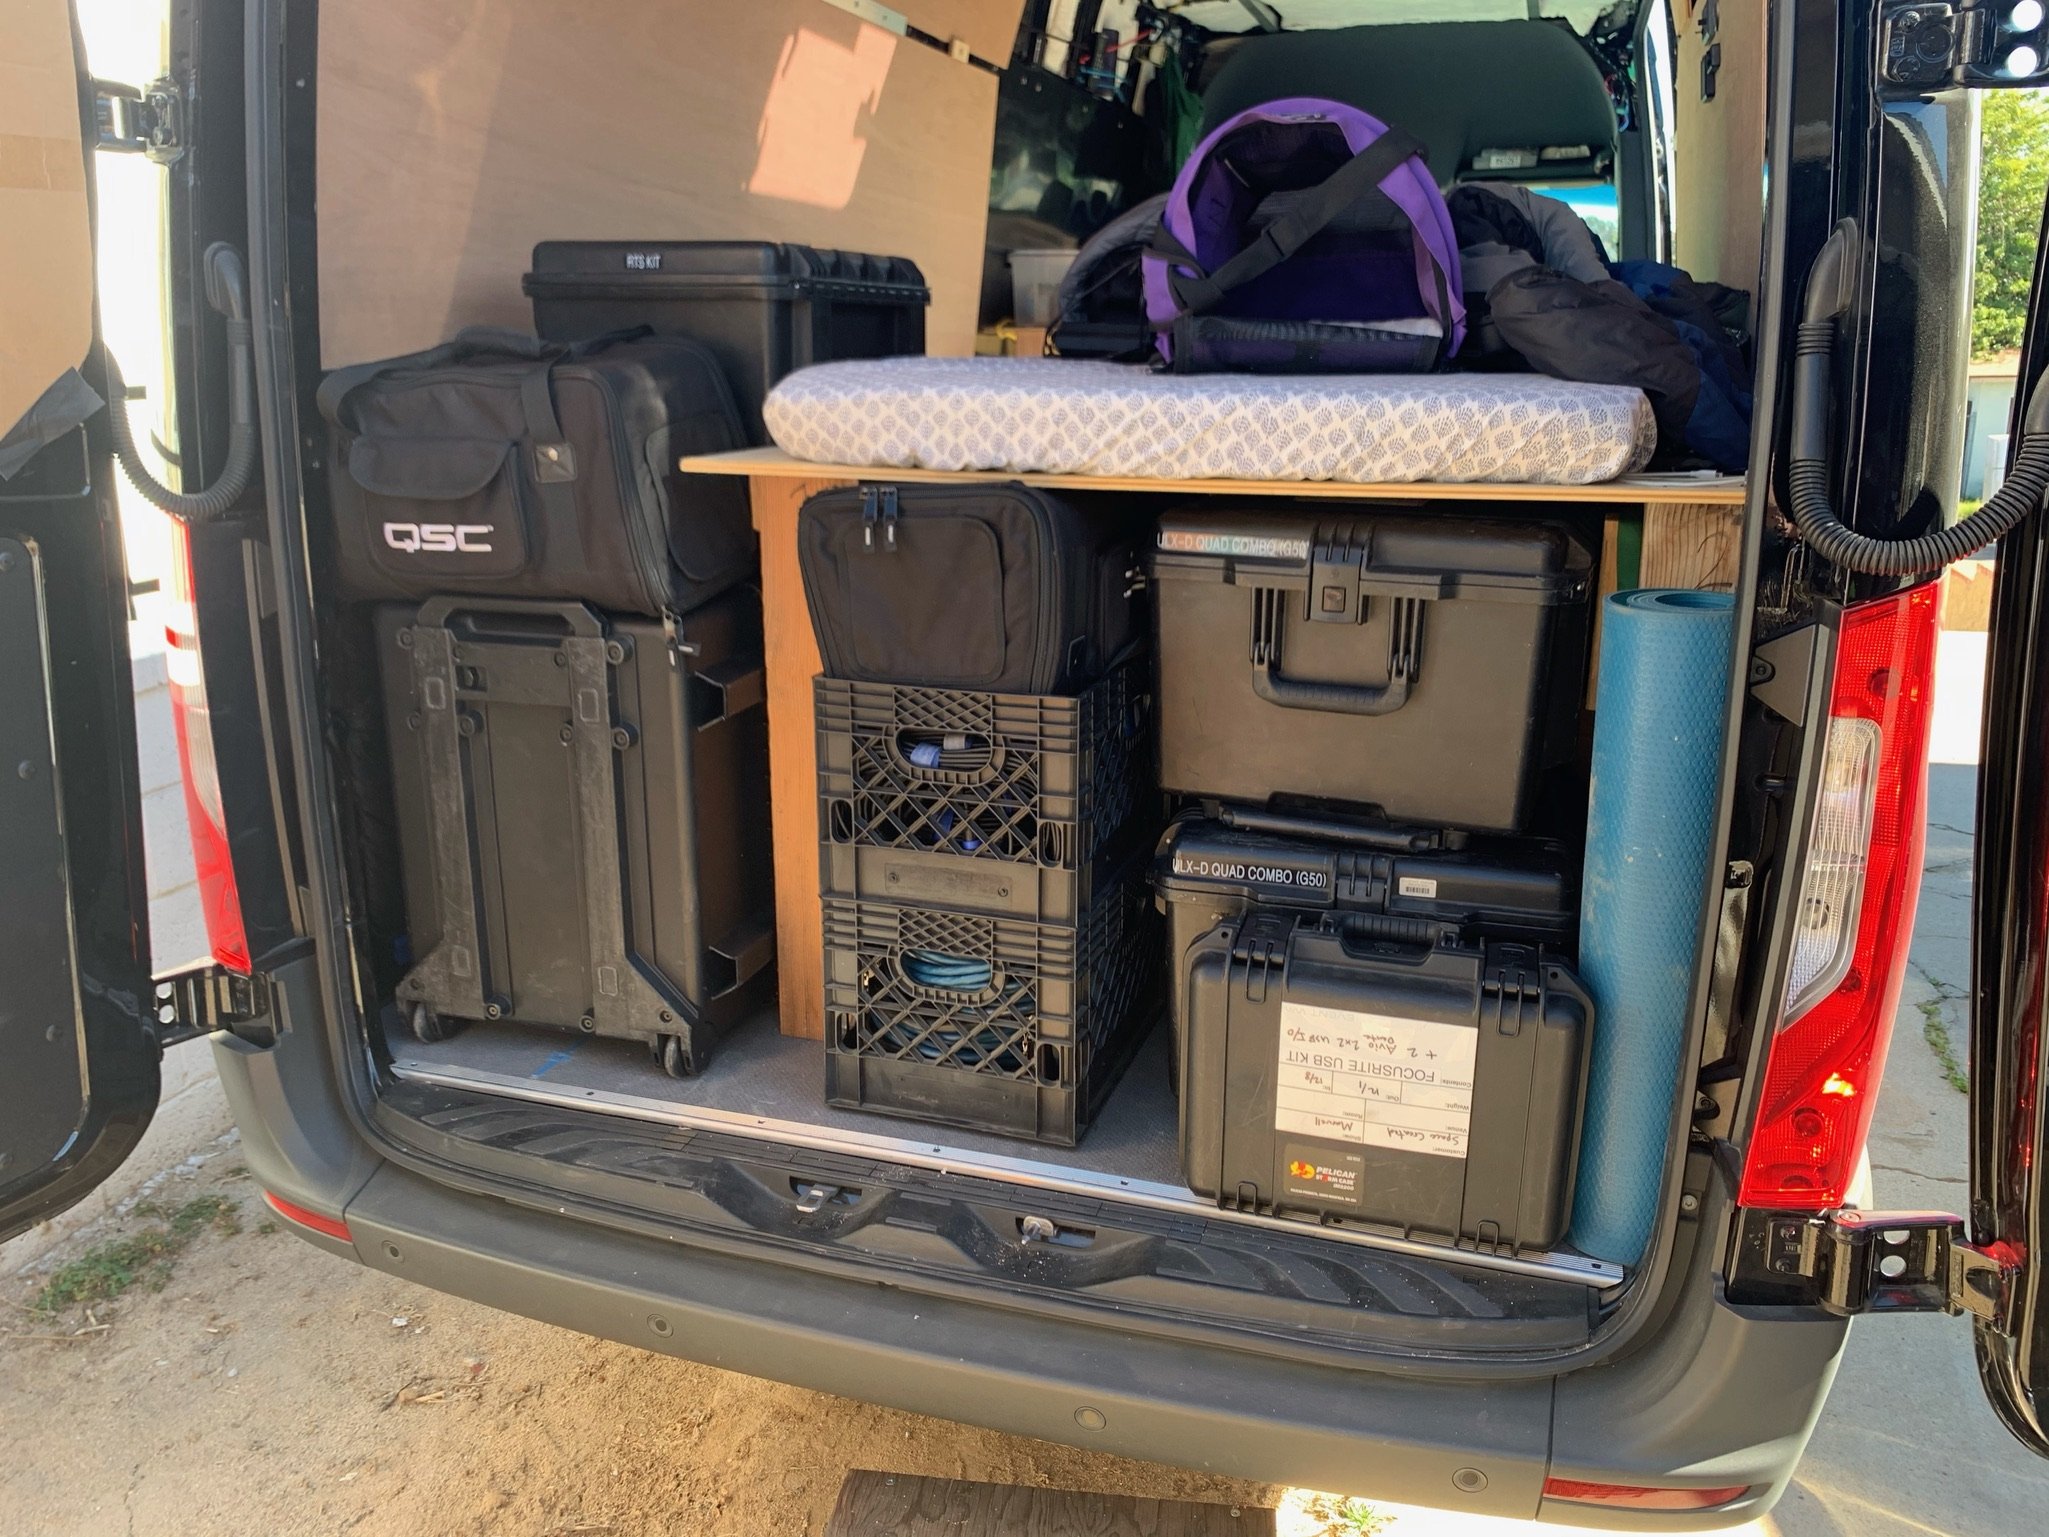
The first weekend we got it, we took it to Big Rocks near Joshua Tree to start getting a feel for the vehicle. We strapped a folding table to the floor, suspended a water jug over a plastic bus tub, inflated a mattress and called it luxury; and it was. We could not stop saying to each other “This is our van!!” And we continued to make it so.
Along with ideas, we had been amassing parts to be installed. Initially we thought it would be perfect to have every kit we were going to use on hand, ready to be measured and planned to the nth degree. In truth, as with anything, it requires a balance, and we needed to balance it by getting some of those kits on the van! So here we go! First up, the roof hatch and vent!
We started here because ripping a bandaid off has nothing on cutting a hole in your new van. Wonderfully exhilarating. No going back now! The other reason to start here is to get some air flow in there. Even with all the doors open, it helps immensely to have something actively moving the air. We chose this vent as it has an auto mode so it can maintain an appropriate temperature for Scout (our cat) prior to the AC kicking in. We went with a roof hatch for a few reasons. It provides fresh air and natural light without being visible from the outside, it allows us access to the future roof deck and solar panels without a ladder for passers by to climb, and we can see the stars from bed. Why not?
Next we moved on to making heat! We landed on a diesel/12v powered heater for its incredibly high efficiency and low power draw. If the heater was running full bore 24/7 it would take a calculated 30 days to drain the factory fuel tank and 300 days when calculated using its most efficient listed consumption rate. And importantly, the controller is accessible without getting out of bed, or into it for that matter. But as with everything else, we have to peel back a few Mercedes layers before we can get where we need, so out come the seats! The heater is under the passenger’s seat and the electrical connections are under the driver’s seat. The blue hoses are the fuel connections under the van.
Next up, sound deadening and insulation! The sound deadening is a butyl tape by in large squares with a foil backing that you cut to size and press onto the interior of the van walls to stop the sheet metal vibrating like a drum making an awful droning noise. The difference is profound. Put insulation on top of that and you have a solid sounding van, and a wam van too! We went with Dynamat Extreme, Dynaliner and Thinsulate. We like that the thinsulate is not just antimicrobial, but also hydrophilic and highly effective. We started with the floors and moved on to the walls. I can’t stress how much of a difference it makes. But there’s no need to use as much Dynamat as we did on the floor. Save yourself.
In the background we are working on the designs for the roof rack, electrical system and water system and trying to get all the parts in. In the foreground, we are continuing to move forward on all the smaller projects we can, from an onboard air compressor with custom bracketry to adding a side window and pre running any cables we can, all while testing and fitting things as they arrive.
And now for a big project, the roof rack! We looked at all the options out there, and there are some great ones, but we decided to use 80/20 and custom build what we needed. I’m so happy we did. We fit the solar we wanted, how we wanted, with room for our hatch, vent and even some decking space to hang out on. We’ve watched some of our favorite sunsets from up there. This rack is a pride point of pride points, I must admit. Most people aren’t daft enough.
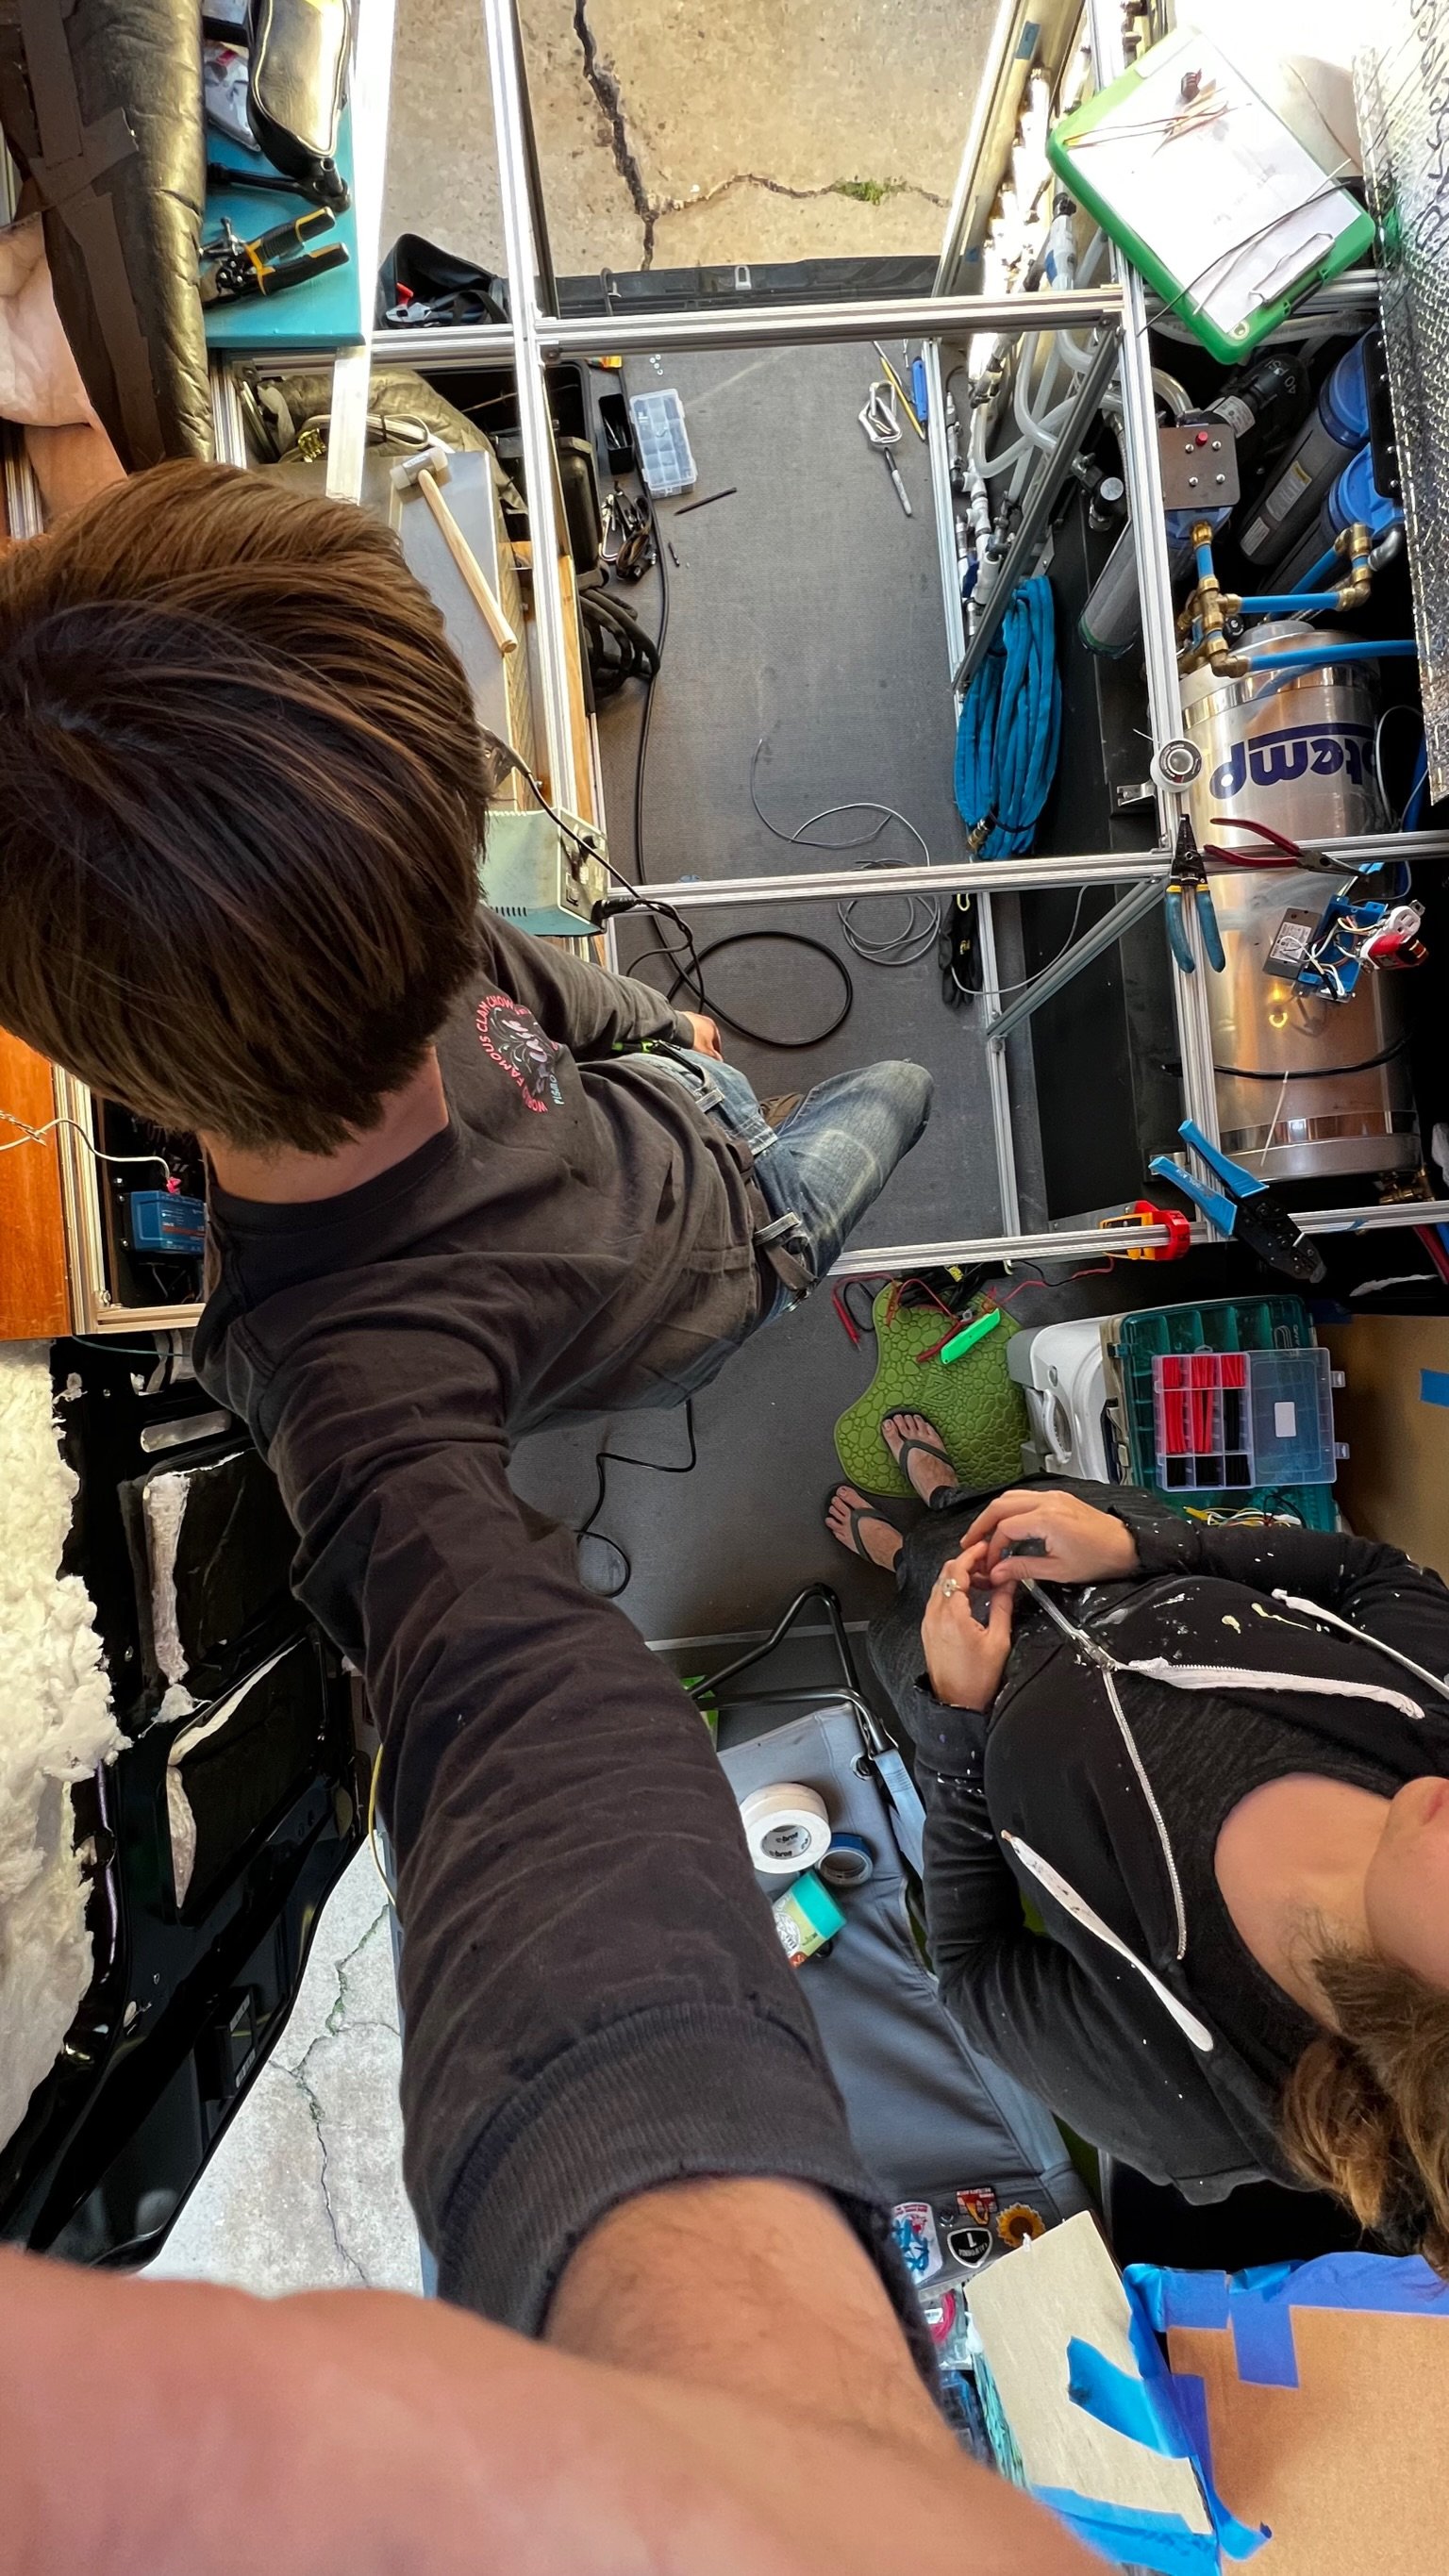
That leads us nicely into electrical! We worked with AM Solar to design a system, supply the parts and support us installing it. They are incredible! We worked from the solar panels down to the electrical area then fleshed that out. We made cardboard cutouts for every little box to be mounted and visualized the cable runs between them. It came together in many stages over quite a while, here are some of those stages.
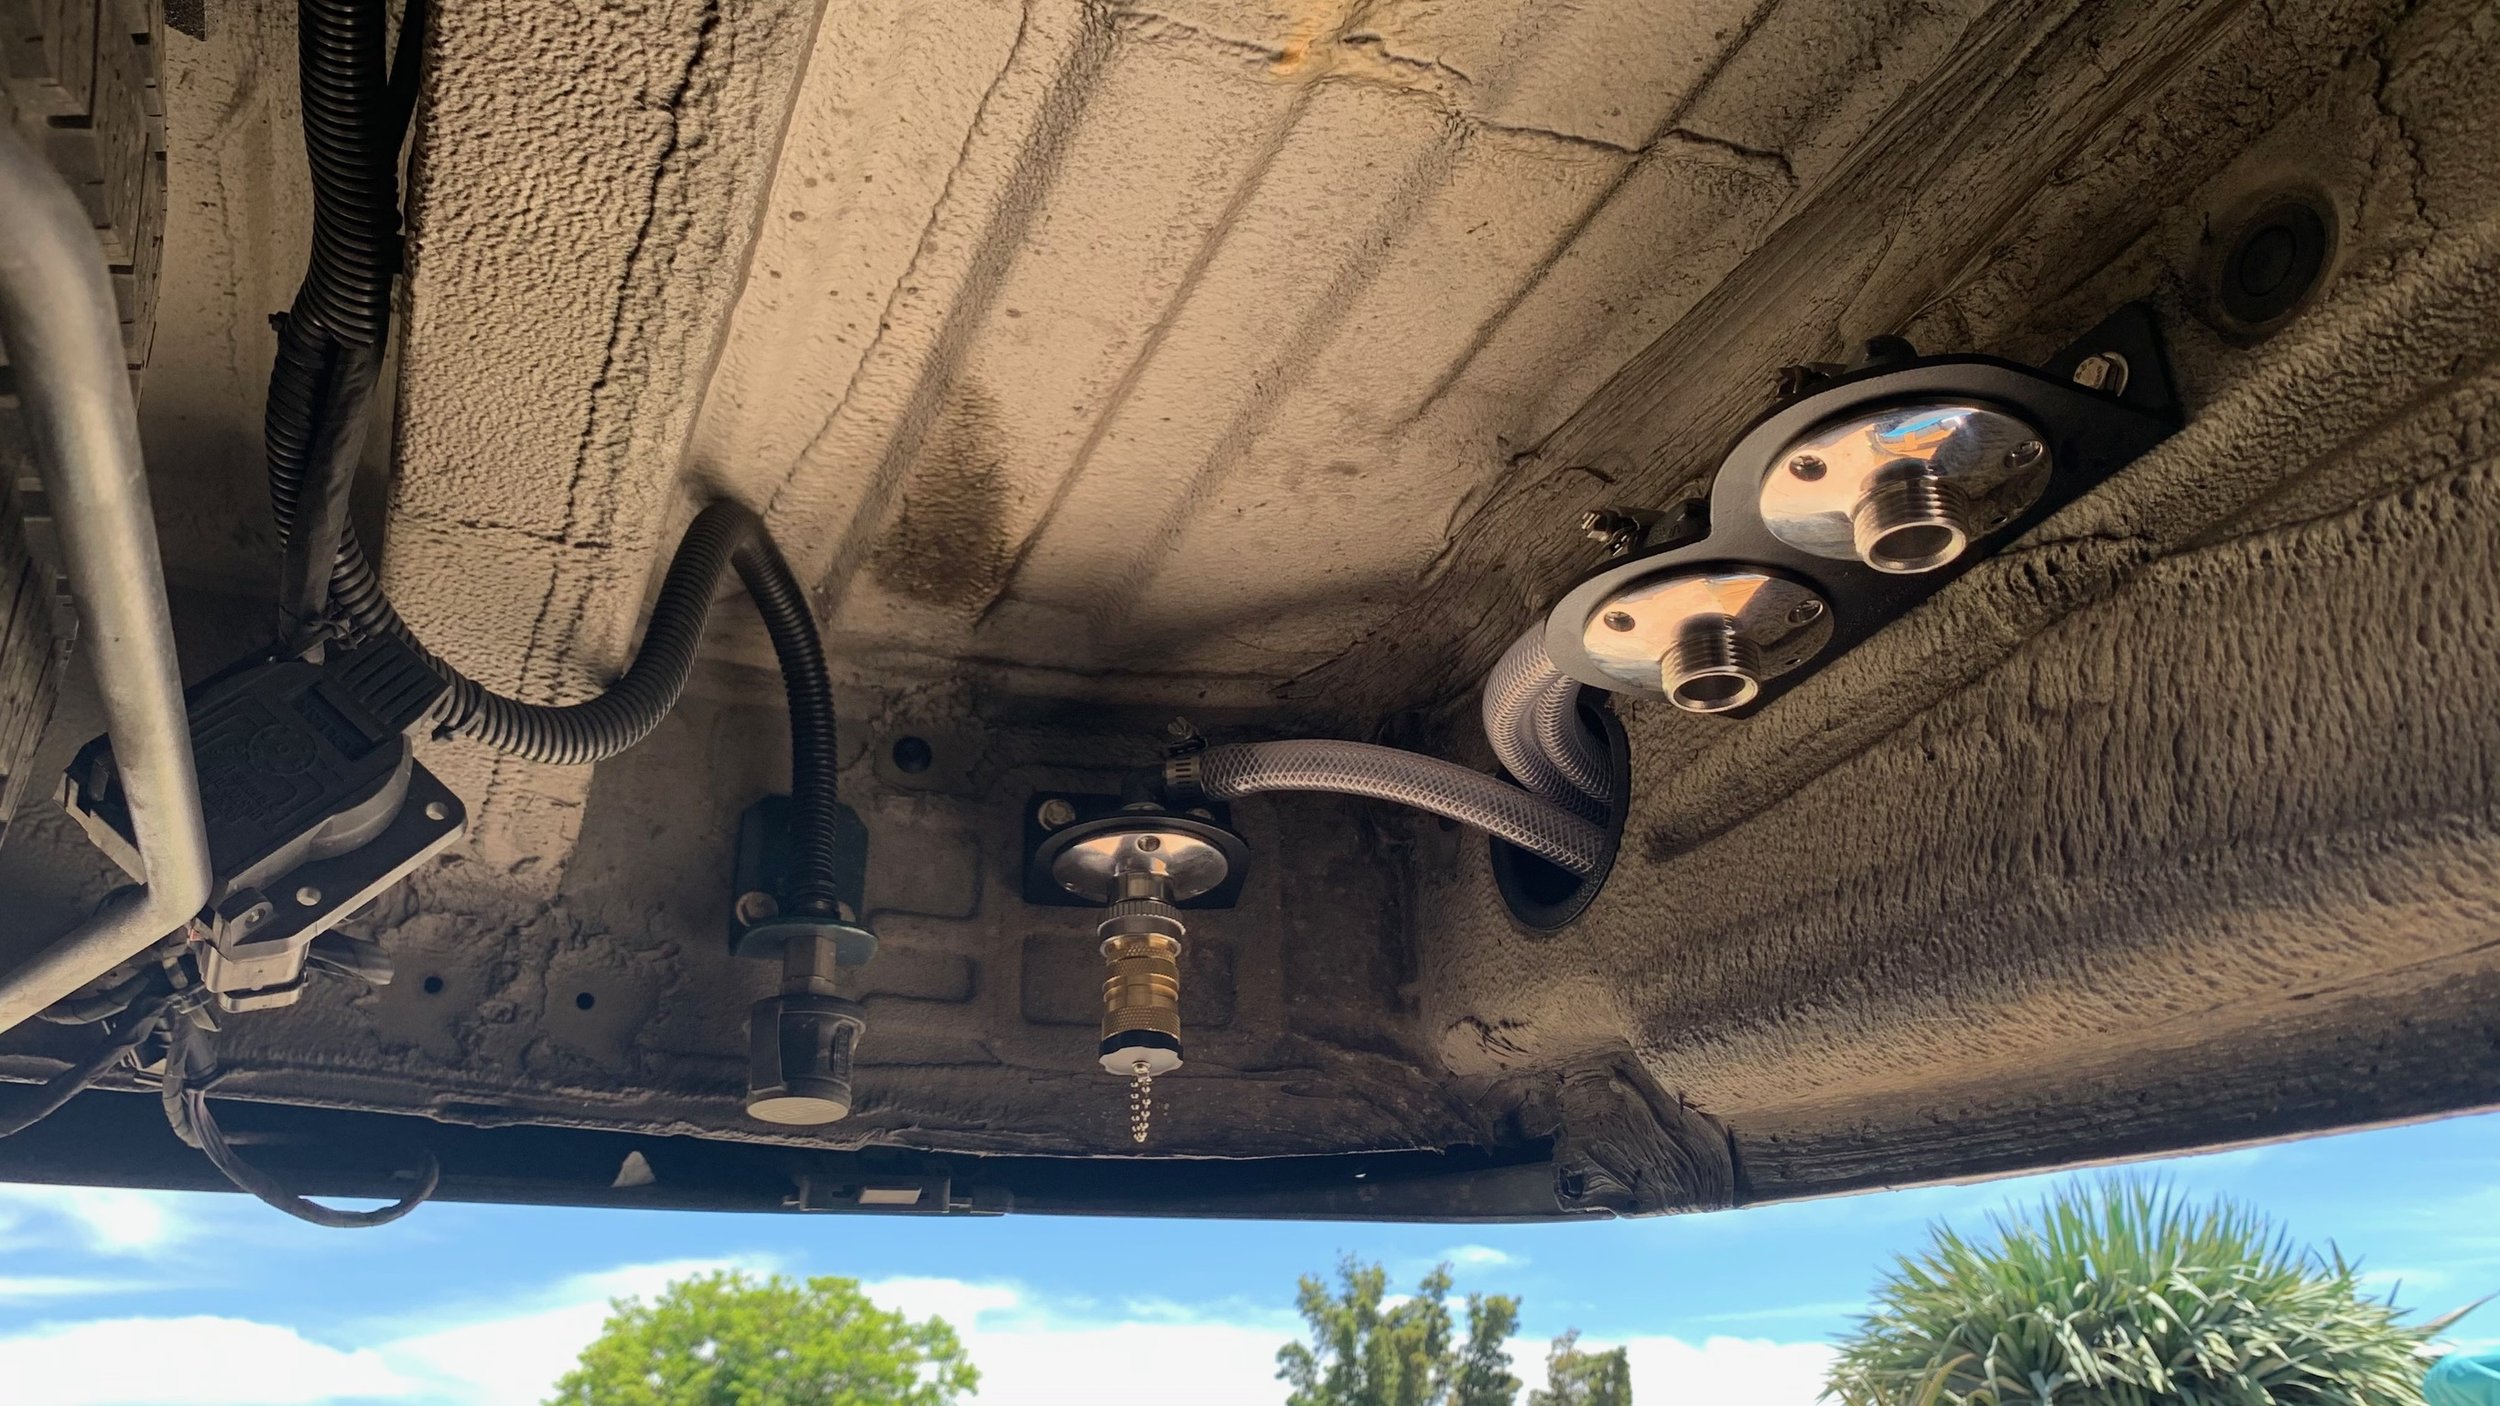
We chose to hide the electrical input, and all in/out puts actually, water too. We like not having to punch more holes in visible areas on the van, and we like people questioning what it is. If you know, you know.
And of course this whole time we are trying to balance getting projects done, and enjoying the van and going on trips! It reminds me of one of my favorite quotes ever, from Ferris Buller’s Day off of course. “Life moves pretty fast. If you don’t stop and look around once in a while, you could miss it.” Many things in my life and Megan’s have reminded us to take nothing for granted, not time, not people, especially. It’s why we lead the life we do. Anyway.
It’s so hard to know what to do next. Sometimes it’s dictated by what parts we have on hand, or maybe something broke or is unreliable, or maybe it just bugs us, we need a hook here or something. It’s a constant conversation right up till the project is complete, what to jump to next. It’s both invaluable, and tough to keep up with ourselves! So from here we looked to the finished state of the interior. Not to finishing it, but to determine what finished looks like and how the heck we get there from here. We started by planning to order a kit made by a company in Oregon. It would have been so simple to install the kit. Fiddly, but nothing like making everything from scratch. So we made everything from scratch… (this should be the norm by the end) We made aluminum support struts that run from the front of the van to the back, milled out for every framing member and bolted at each as well. Then we made track like strips that grip the upper and lower edge of every panel, and allow us to remove them individually to get to problem areas. We test fit at the back in cardboard and then paneled moving forward. It was certainly transformative! Oh and here and there we have been cutting down insulation to size and gluing it, pulling it, stuffing it into every nook and cranny. So the wall sandwich is, van steel skin, dynamat, thinsulate, reflectix, 6mm marine ply. It’s a lot going on, and in van forums, stupidly controversial, but hey, it’s working great for us!
I mentioned taking care of things as they annoyed us, and here is a perfect example of that. We needed places to put our phones while we drove, who doesn’t. So I started searching for the best solution I could find. I like the Ram Mount clamp mechanisms, but didn’t like the phone connection, nor the vehicle connection. So I milled a piece of HDPE to fit the angles on the back of the infotainment screen, and a slot for Ram track on top, bolted the track on and glued the HDPE to the back of the screen. For the phone side of it, at the time I was sold by the Scosche magnet mounts. They’r pretty great, but Ram had no interface for them, but they did have parts I could use to make my own. So I used one part Scosche mount, one part Ram 1/4”-20 threaded ball and one part 3D printed part. It worked wonderfully, except off road. And having the rest of the track there is great, we have mounts for everything, including my sunglasses case! Too far is relative.
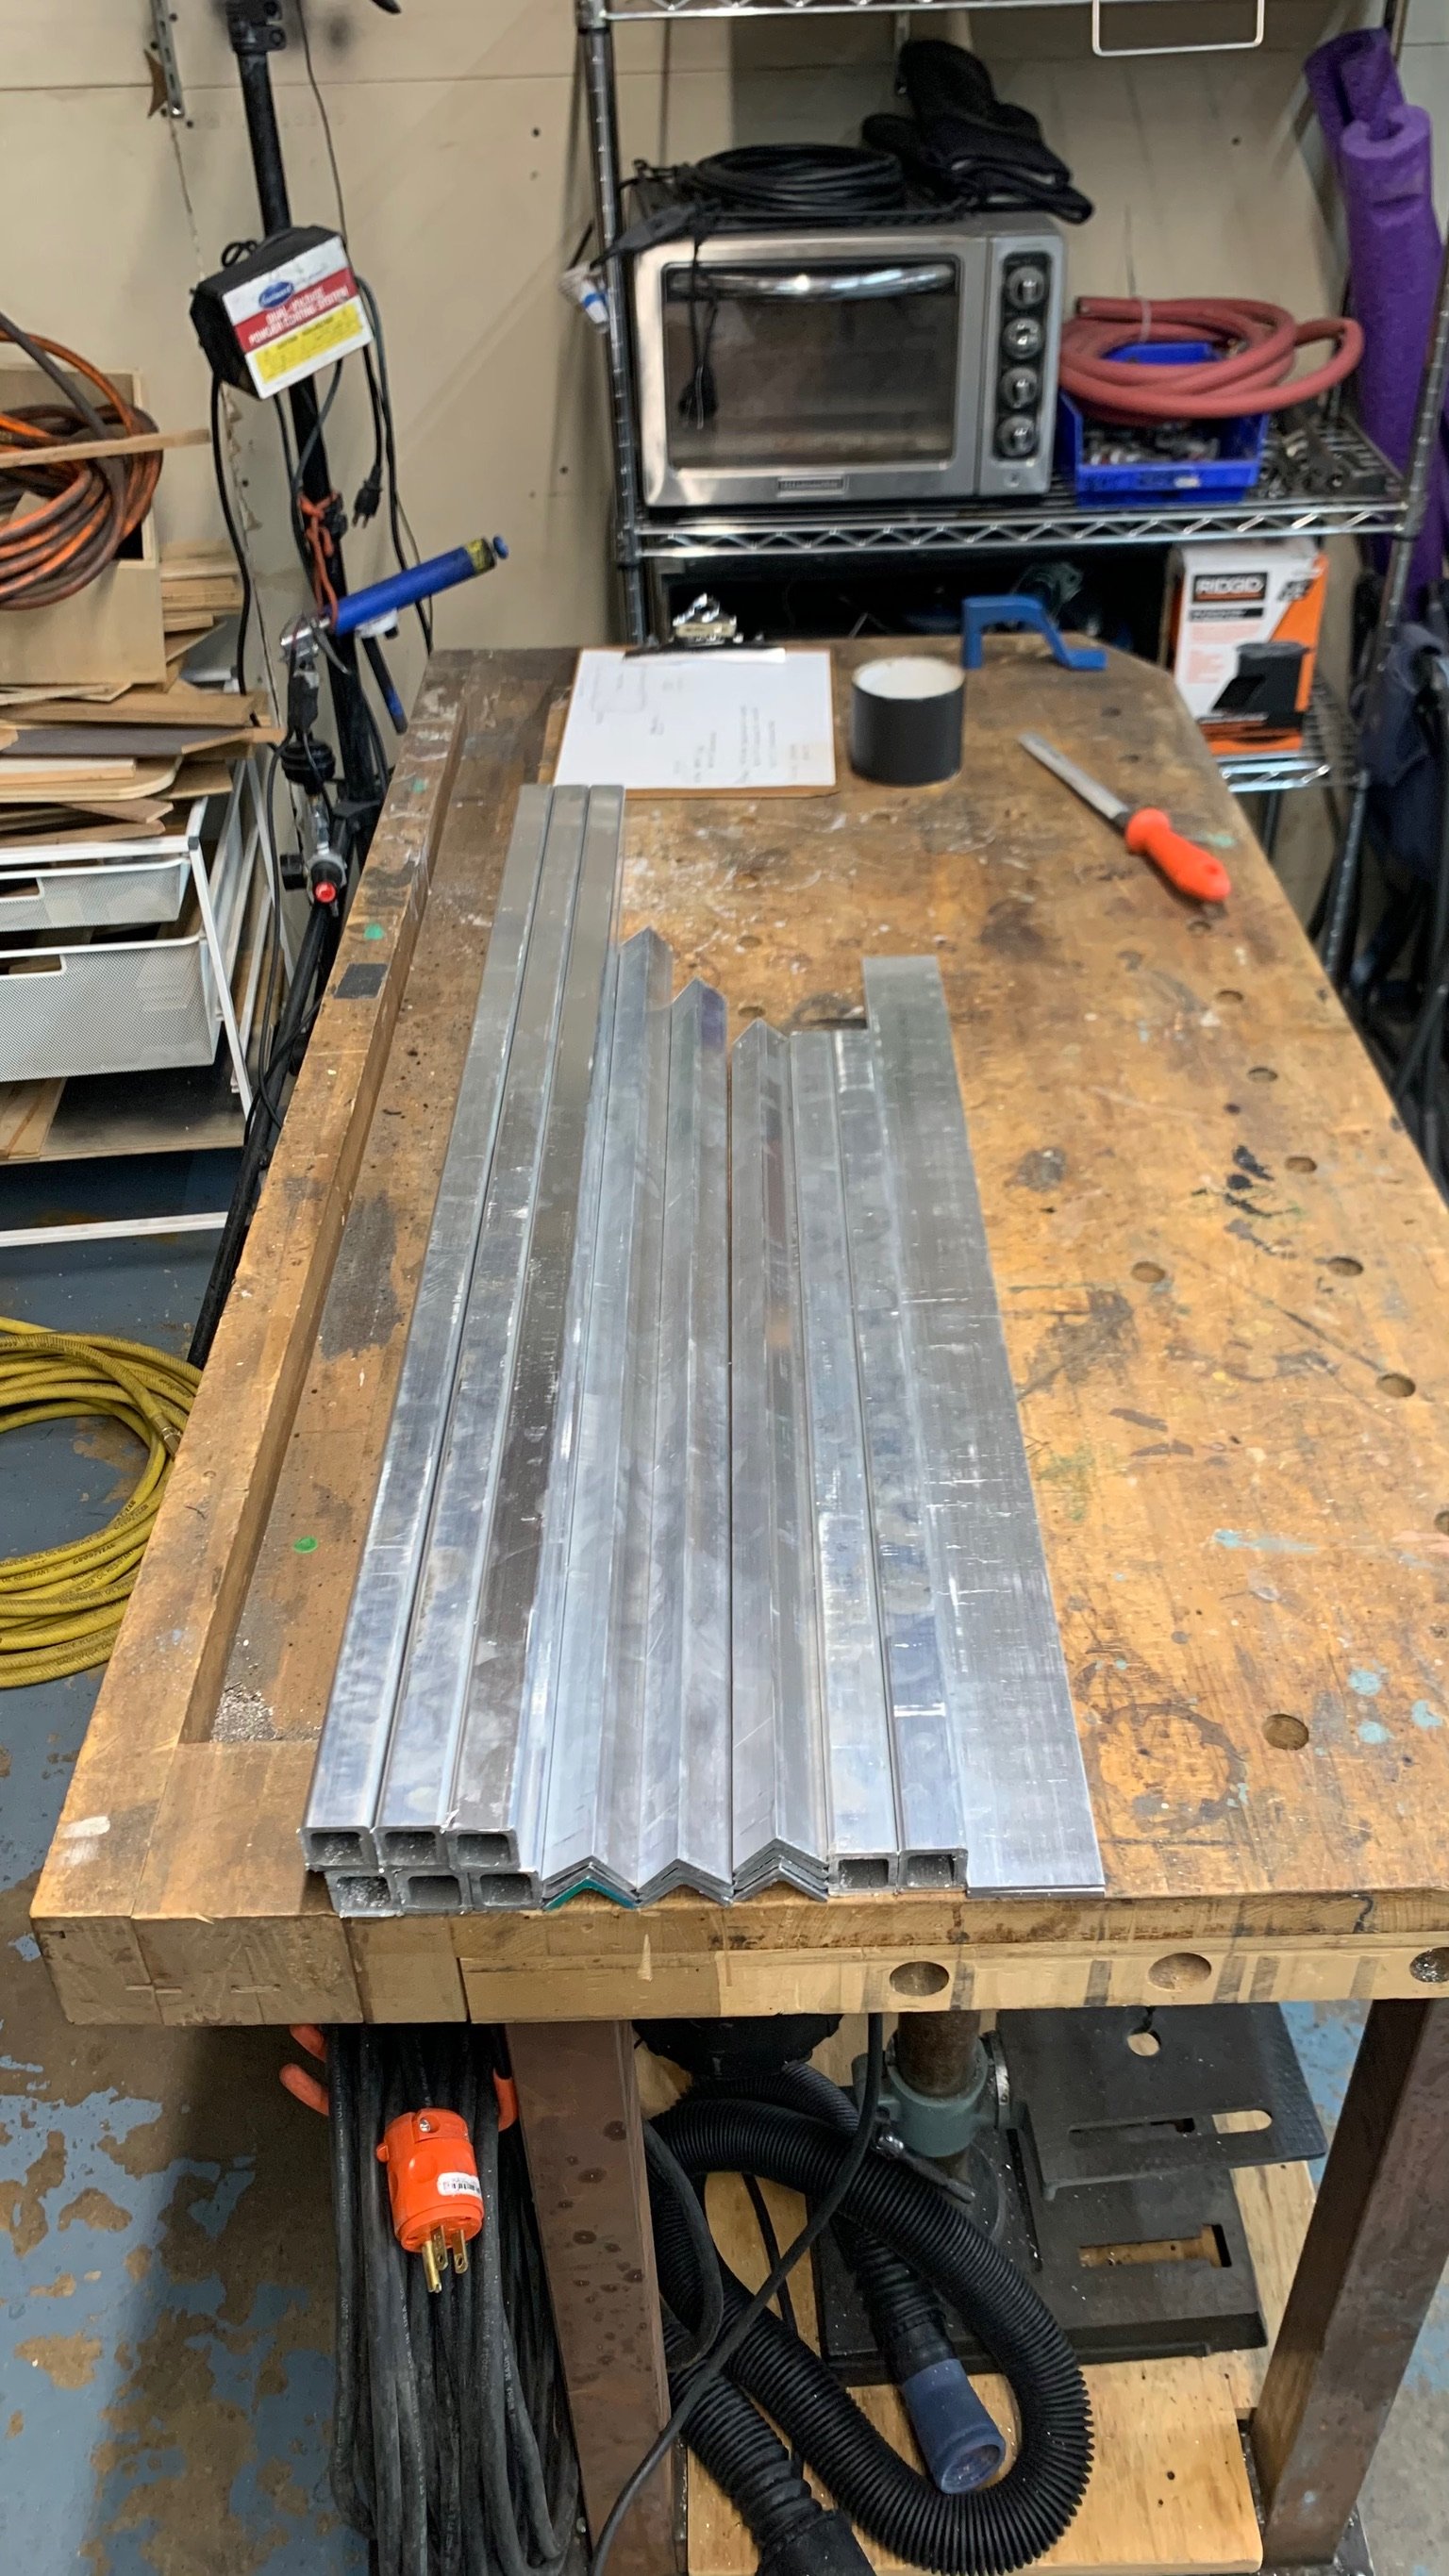
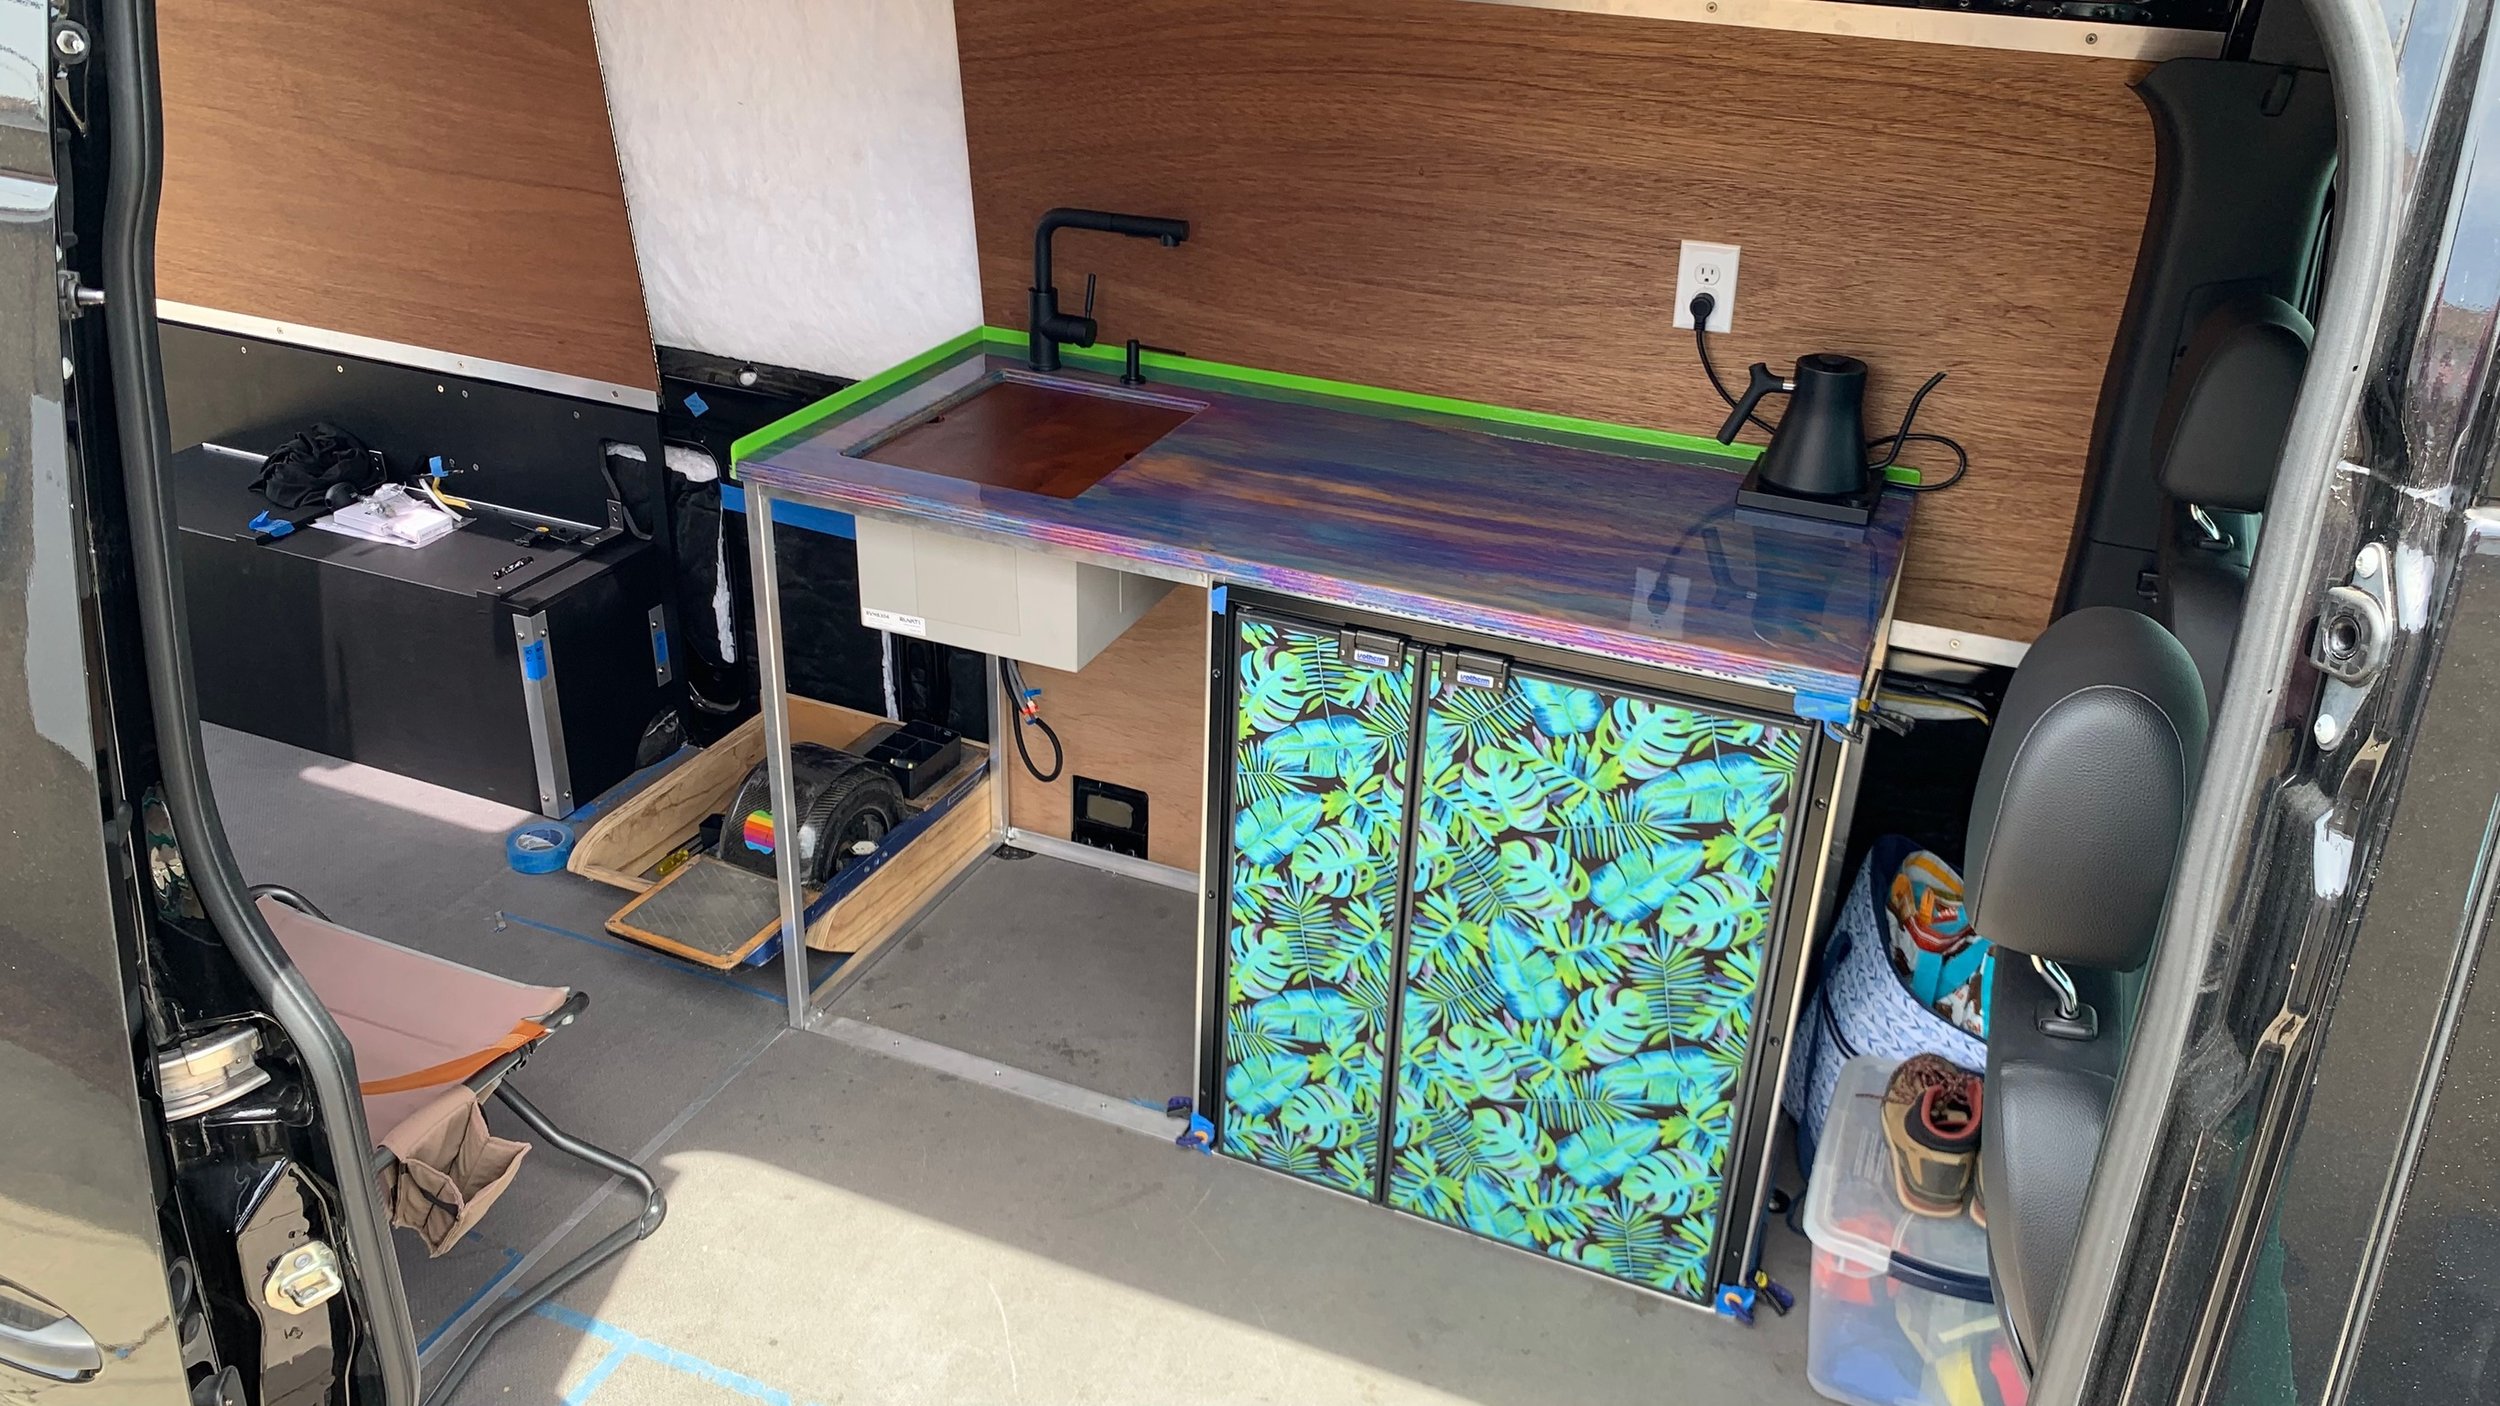
It’s time to get some structure in here! Time for a kitchen! We designed it to be width wise, a rather short kitchen, but with decent depth. It made the best use of the space we felt, and reserved the same depth for the shower later. When it first went in, it was just some wood tacked together, to again, get a feeling for the space and what we really needed. Once we were happy, we got to welding up an aluminum frame, cutting a top, installing the fridge and coating the top in epoxy resin.
Megan did an amazing job on that one. Our first epoxy resin and pigment project ever and she nailed it.
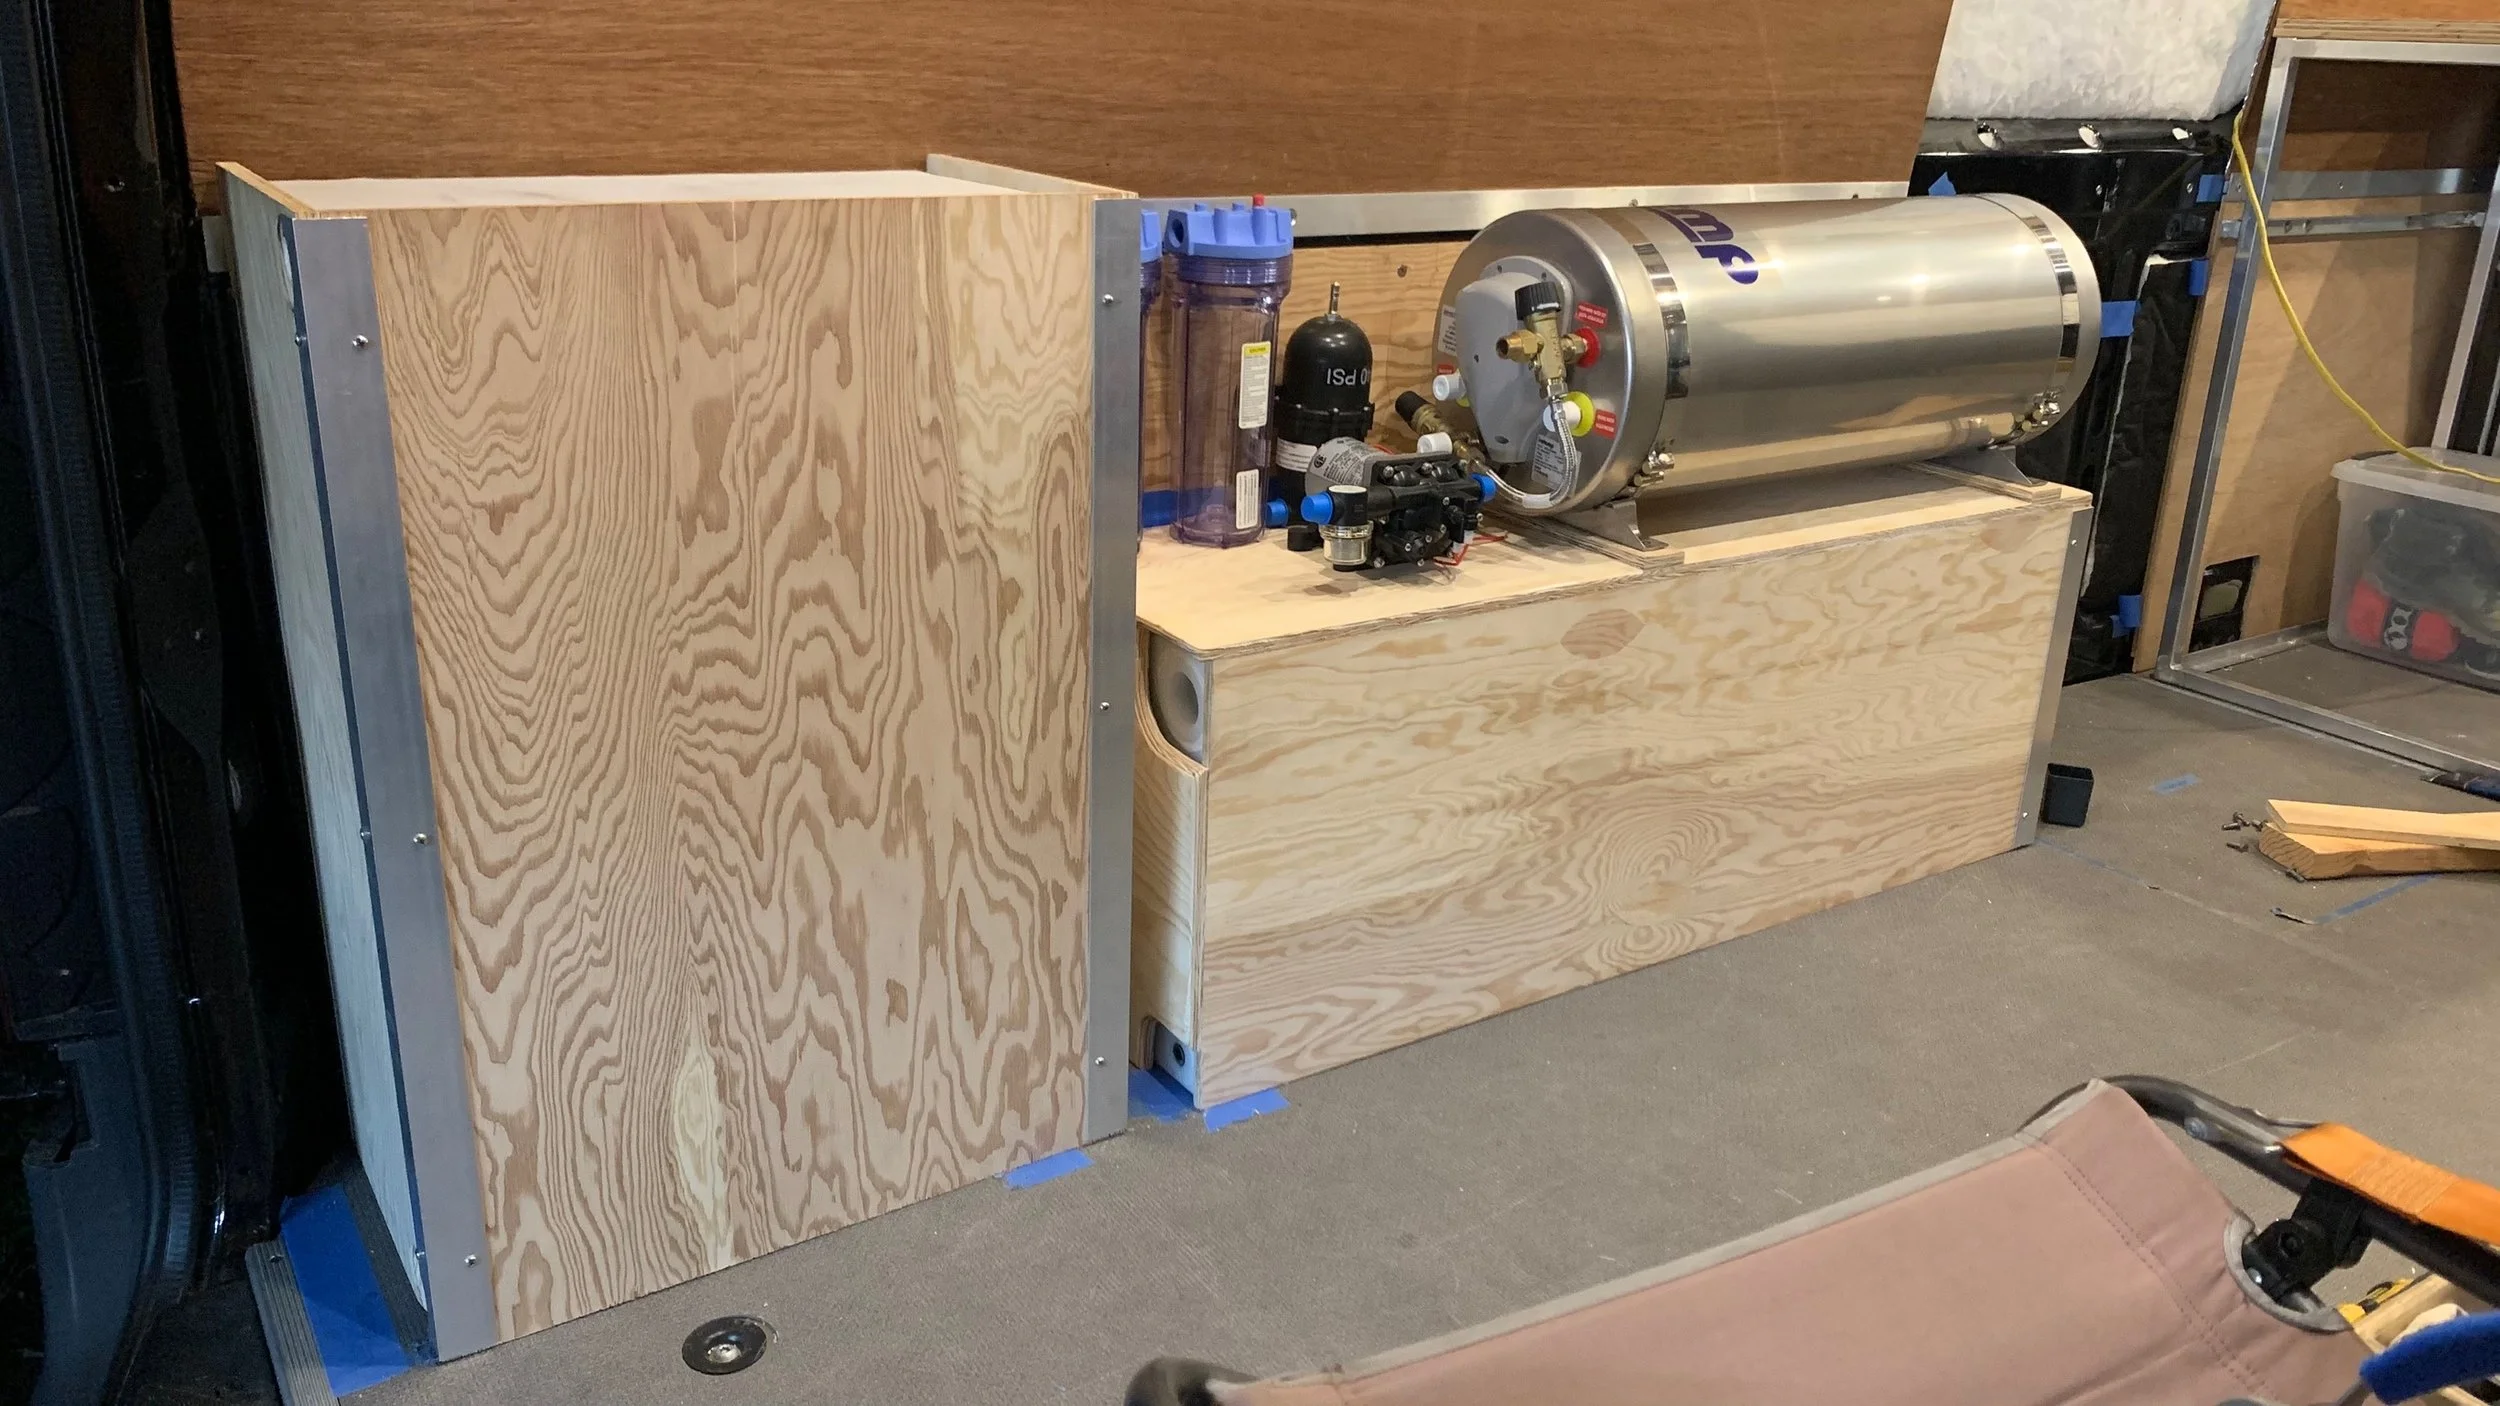
With a sink suspended mid van, we had to move on to plumbing! I teased some sketches earlier, but we designed the system to be a little nuts. It’s 50~ US gallons of fresh water on the warm interior with ~20 gal. grey tank storage under the kitchen and an extra ~20 gal. tank where the spare tire was, to use as needed. Anything that goes into the fresh tanks (there are two, so we can isolate if there are issues) is filtered to 10m in a sediment depth filter, 0.5m in an activated carbon filter and then through a UV filter. When it comes out of the tanks it all goes through a duplicate 0.5m filter for taste and piece of mind. Same with any water when in city pressure mode. We can also take the water from the tanks, send it through the filtration system, and back into the tanks if we are ever worried about the state of the water, if it’s been sitting say. We can even reverse the system to pump fresh water out the same connection we take it in through, for washing paddle boards, bikes and ourselves. Cold only at this point though. It’s not a shower. That complexity comes later.
We have used and continue to use a cartridge toilet for black waste. It simplifies that process for us a lot. But here are some photos of the fresh water system build first.
It was a bit of a challenge to find the right grey tank that would fit between the factory framing of the van and the side wall, with room for insulation and mounting. And critically, we didn’t want it visible from the exterior without making quite an effort to look under the van. We like what little stealth we have. The frame we welded up might be the most frustrating steel object I have ever worked with. Never has material warpage been so critical of our best efforts. I think it came out pretty well though! Complete with steel plate to protect the tank, heating pad and temperature sensor.
Ah boy, i’m tired just thinking about it!
I mentioned our hidden water input earlier, it hangs out with the tank vents and the air compressor output. Each on their own little mount. It makes me happy.
I lost count of how many different temporary bed situations we had. We started on the floor, on an air mattress, then moved up to the top of some 6x6 scrap wood we ended up with, modifying it to suit before each trip. As with every other temporary bed solution, it massively informed the final solution. One of the most critical measurements to me was the height I would have when sitting up in bed, while still maximizing storage space under the bed. (In the garage as we call it) How do you calculate mattress squish on a mattress you haven’t ordered yet? For the frame, we chose 80/20. Strong and endlessly modifiable. Well, we have found the end of it on a couple occasions, but thats usually my fault.
We snuck the A/C install in there somewhere. It’s in a few previous photos, but the evaporator is mounted in the bed framing, below the bed with the air output snorkel turning its way back and up the wall. The condenser is mounted under the van, just behind the rear axel. It’s a 12v minisplit system from Cruise and Comfort. The HD Series. They are a great company with a great product. At one time we thought we could manage with active ventilation only, but these days thats just not true. And certainly not if we want to ensure Scout is at a good temperature. The ultimate goal is for it to work similar to police cars with K9s. The AC will run off battery, charged by solar at minimum. But if the battery voltage gets too low, or the temperature too high, the van engine will automatically turn on, thus turning on the separate factory AC system and charging the battery at the same time. It’s effectively a remote start system with a little logic behind it. The Victron system monitors the temperature and voltage and closes a relay if either logc event occurs. The relay closure is read by a couple black boxes my Mid City Engineering which handles the remote start part of it, along with a lot of additional features. We can access both the Victron system and Mid City/Drone Mobile system wirelessly from our phones to operate any of its features. Can we say “MAN OVERBOARD!!”?
We’d be lying if we said all the projects we moved on from were finished. There is always more to be done! It’s why my dad always cautions us to actually finish the thing. It’s going to be finished to others, for sure, but to us, no, nothing is ever finished. It reminds me of a quote by one of his heroes, Leonardo Da Vinci: “Art is never finished, only abandoned.” And so here we are, far from abandoning our art, but rather drowning in it. A happy drowning.
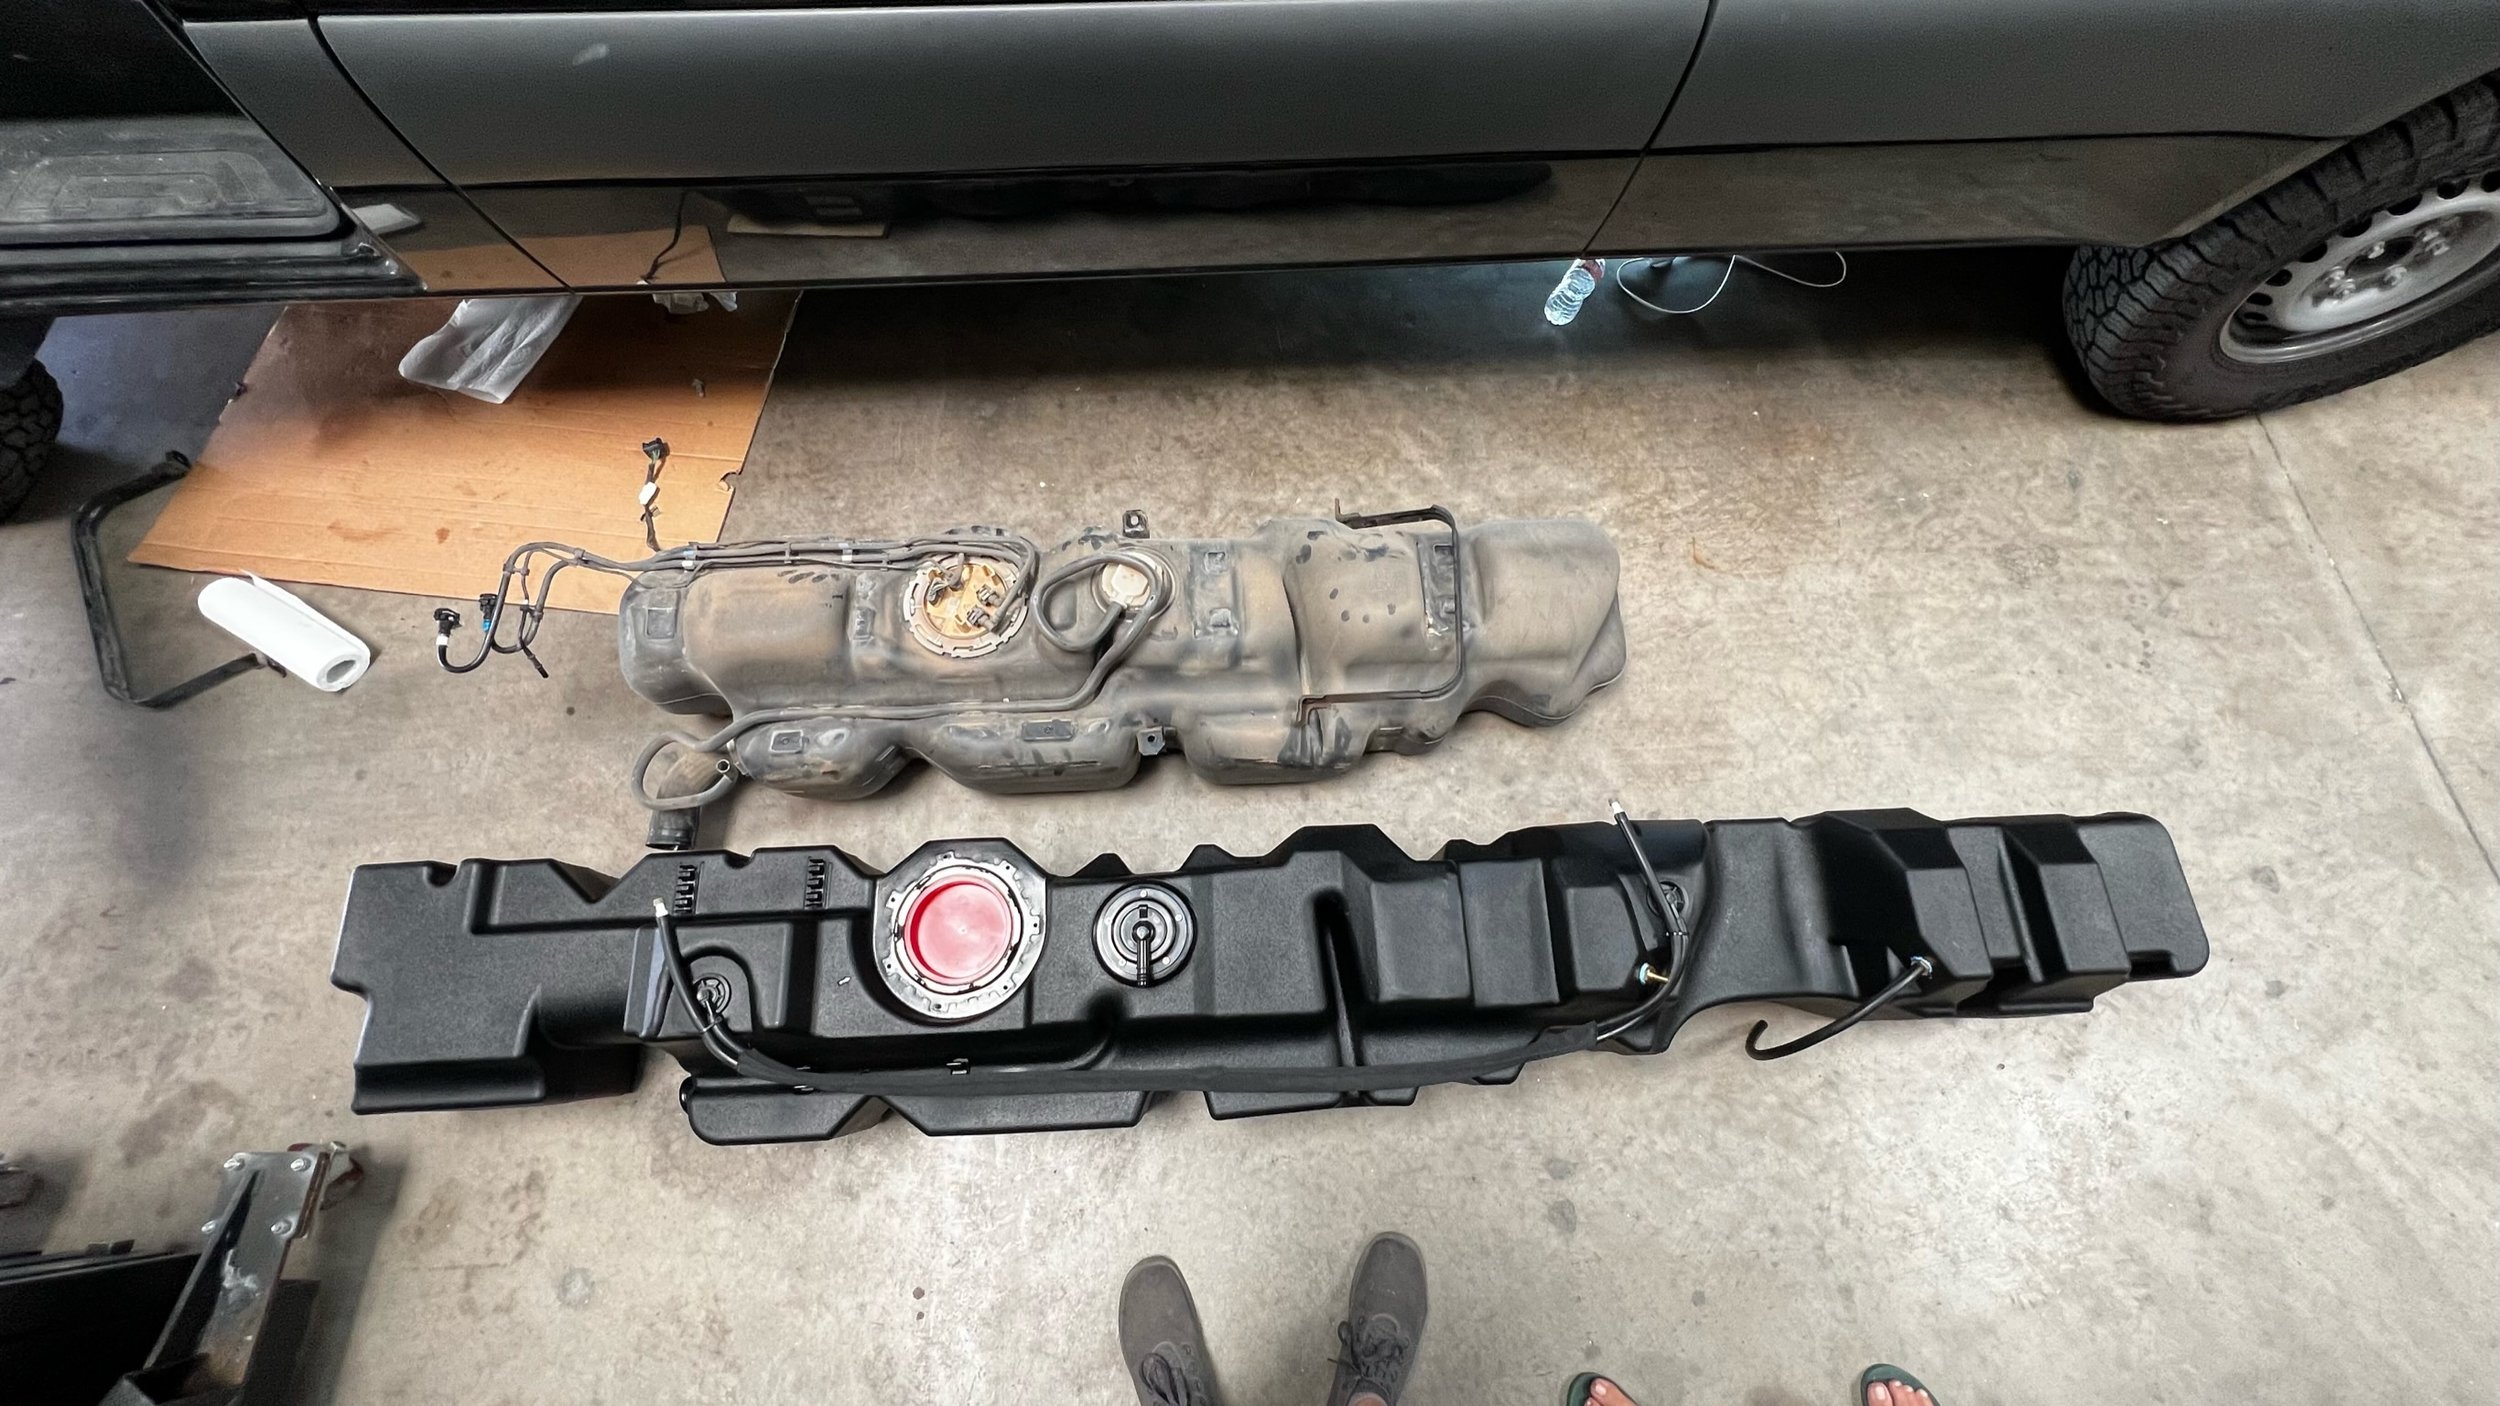
Next up was replacing the fuel tank. The factory one is 24 US gallons, the new one is 47. The extended range is lovely for driving and for the heater.
We found that on the hotter days, the electrics cabinet got too hot, so we added some forced air. We did the same behind the fridge to try to prevent a build up of hot air, as well as piped the intake for the fan that cools the condenser coils from the side of the cabinet so it was as room temperature as it could be. The fan is in the bottom corner and the intake is the silver dryer tube.
The next most annoying thing to us (as it often works) was the lack of drawers under the sink, next to the fridge. We had been using stacked plastic bins, unstacking and laying them out anytime we needed anything from them. We had a plan for drawers for some time, each one maximizing the depth everywhere as we could. We played with the sizes of our dish ware and hardware and made our best attempt at a layout that would serve us now and in the future. The first step in the plan, was to build an 80/20 frame inside the welded frame of the kitchen we already had. Which more than anything else, took patience. so many fasters in so little space, inside a frame we can’t take apart.
That’s as far as the website has (had) been updated, well behind physical progress. Thanks for sticking with us this far. We hope to have more updates to the site soon as we barrel towards our April 2024 deadline. Or perhaps to follow soon after.
Oh my! How time flies. I’m picking this back up a couple months after returning from our incredible Alaskan/Canadian adventure. While that was the longest and most anticipated trip since the last update, we have done so much work and play. From Vegas to Hawaii, Texas to Australia, and even a visit with the family in England and selling the house. Wow, it’s been too long! I will try to pick up where we left off.
I should mention, the drawers worked out great! At this point they still needed drawer faces, but function pretty well. We removed an annoyance and increased storage capacity a meaningfull amount! Next up, suspension! One of the few tasks we decided to not tackle ourselves. With all the weight we have added to the vehicle, the handling has become rather atrocious. Agile Offroad is just down the road from the shop, and we had them tackle the problem. It felt weird to have someone else work on the van, but so much better than wondering if we did it right. The factory 4x4s are blocked up about 3” higher than stock. This suspension kit added another inch or so in the front and roughly 3'“ in the back. And about 18 Agile logos… The ride difference is incredible. One of those “Wish we had done that sooner” deals.
Here we are beginning to get an idea of what the shower might look like. We like the rather open view to the back, but also need to keep it enclosed enough to shower in. We considered many different options, from just a shower curtain, to a full aluminum enclosure. It’s so hard to decide which makes the most sense.
Gotta keep up on those oil changes!
So at this point, the major things to finish are the shower, Scout’s litter box area, the closet/dresser and the bench at the door. We have sold the house and are working on the van every opportunity, but it is rather hard to live in a construction zone, especially one so tiny! Around this time I began looking at little campers. Vanagon style, but perhaps more modern. We agreed early on that we could not start another project until this one was done, and everyone knows a vanagon is a project on wheels, however done it it. The perfect vehicle popped up in Seattle, and knowing immediately how positive it would be for us, we went for it. You can see a little more of it on the Tetris the Metris link off our home page.


